React Authentication App with Lock - Auth0
The source code is available on Github
The difference between website and web application stands probably whether it interacts with users. Web applications, mostly, need users to make accounts to use their services. And there lies the burden for website developers: How do we let them make their accounts? And login?
In this article, I’m going to show you how to create a React Authentication app, embedding the Auth0 form with Lock.
Simply put, the Lock is an embeddable login form of Auth0. And the app that I’m creating is the refinement of Auth0’s official React Login sample project. So, if you have not yet followed their tutorial, I recommend to do it beforehand.
Also, the primary knowledge in React Router is recommended as well because the routing process depends on its package. If you are interested in React Router, please check out my previous post on React router.
Before get started
In order to run this app, you must create an Auth0 account. So if you have not yet had their account, please go to their website and create an account.
From the Dashboard, please create a new client. After that, in the client setting, please add http://localhost:3000/login to the Allowed Callback URLs, http://localhost:3000 to the Allowed Web Origins. You can download the React sample project from the Quick Start, which contains a variable config file.
I used the same Auth0 client for testing the sample project by Auth0 and this app. This should not be the problem and you may want to do the same.
ATTENTION: With v11 of Lock, I detected the problem that you cannot sign up—although you can log in—due to the cross-origin authentication. In order to make a test user, you need to run Auth0’s sample project and create a new account from there. Or you can create a new user from Users in the dashboard.
About the App
There are basically four pages in this authentication app:
- /: Top page.
- /private: Private page that requires authentication to view. Redirects to /login page if not authenticated.
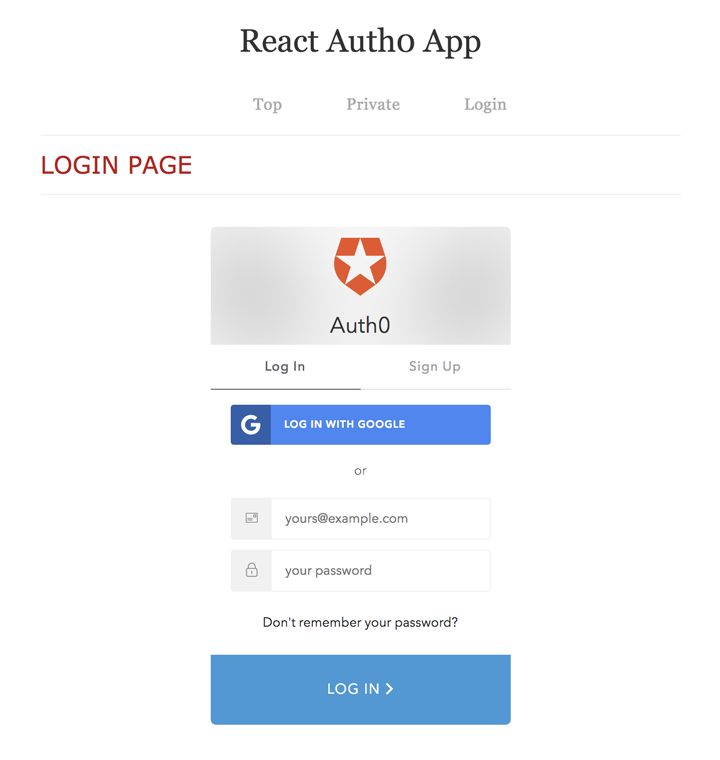
- /login: Login page, which is embedded the Auth0 login form.
- /logout: Logout page, has nothing to show. Redirects to /login after removing sessions.
File Preparation
Let’s initialize a project with create-react-app,
// If you haven’t installed
$ npm install -g create-react-app

$ create-react-app react-auth0
$ cd react-auth0
Install additional dependencies:
$ yarn add auth0-lock react-router-dom
// Or
$ npm install --save auth0-lock react-router-dom
The structure of our source files is as follows:
src
├── Auth
│   ├── Lock.js
│   ├── Login.js
│   ├── Logout.js
│   ├── auth0-variables.js
│   └── isAuthenticated.js
├── Components
│   ├── Header.js
│   ├── Private.js
│   └── Top.js
├── App.js
├── index.css
└── index.js
You can delete the unnecessary files or leave them there—they do not interfere the application anyway. For the index.css, please refer to its raw data on Github repo.
Now let’s get started to create the app.
Core JS Files
Before writing code attributing to the authentication, let us create core JS files that handle basic routing/rendering.
index.js
import React from 'react';
import { render } from 'react-dom';
import { BrowserRouter } from 'react-router-dom';
import App from './App';
import './index.css';

render((
  <BrowserRouter>
    <App />
  </BrowserRouter>
), document.getElementById('root'));
As you know, the index.js is the entry file of this application. While in Auth0’s sample project they use history/createBrowserHistory module to handle redirections, I prefer letting React Router do the job. Hence, I wrapped <App /> with <BrowserRouter />, and I use <Redirect /> component whenever I need to redirect.
I’m quiet not sure whether we can use BrowserRouter and history together in the same application. But at first when I try to let it redirect with history within BrowserRouter, it did not work—Browser’s location(URL) was changed, yet somehow the component was not re-render. There might be some work-around, but I simply stick to <Redirect /> for redirection.
App.js
import React from 'react';
import { Switch, Route } from 'react-router-dom';
import Header from './Components/Header';
import Top from './Components/Top';
import Private from './Components/Private';
import Login from './Auth/Login';
import Logout from './Auth/Logout';

const App = () => (
  <div>
    <Header />
    <main>
      <Switch>
        <Route exact path="/" component={Top} />
        <Route path="/private" component={Private} />
        <Route path="/login" component={Login} />
        <Route path="/logout" component={Logout} />
        }}/>
      </Switch>
    </main>
  </div>
)

export default App
The App.js is the main framework of this application. It shows the component that matches to the current path.
Another different from the Auth0’s sample in this app is that I eliminated the Auth module that deals with all authentication process. Instead, each component of the application handles the process that is associated to themselves: Login for login, Logout for logout. For checking if the user has already session or not, I created the new function called isAuthenticated.
Auth/isAuthenticated.js
export default function isAuthenticated() {
  // Check whether the current time is past the
  // access token's expiry time
  let expiresAt = JSON.parse(localStorage.getItem('expires_at'));
  return new Date().getTime() < expiresAt;
}
Inside the header, the application change a link to show based on whether the user is logged in or not. Display Login if not logged in, and Logout if they are. The <Header> looks like this:
Components/Header.js
import React from 'react';
import { Link } from 'react-router-dom';
import isAuthenticated from '../Auth/isAuthenticated';

const Header = () => (
  <header>
    <h1>React Auth0 App</h1>
    <nav>
      <ul>
        <li><Link to='/'>Top</Link></li>
        <li><Link to='/private'>Private</Link></li>
        {
          !isAuthenticated() && (
            <li><Link to='/login'>Login</Link></li>
          )
        }
        {
          isAuthenticated() && (
            <li><Link to='/logout'>Logout</Link></li>
          )
        }
      </ul>
    </nav>
  </header>
)

export default Header;
Technically <Top> is not a core file. But the page does not require special function. So let’s create the page here.
Components/Top.js
import React from 'react';

const Top = () => (
  <div>
    <h2>Top Page</h2>
    <p>Hi,</p>
    <p>If you are seeing this message, your authentication app is properly running. Please keep on checking by clicking the link buttons inside the header, which were generated from the <em>Link</em> element of React Router.</p>
  </div>
)

export default Top;
Login
Not only show the page, the <Login> requires to have most of authentication process because now the login form is embedded! The first file you need is auth0-variables.js that defines variable for using your Auth0 client.
Auth/auth0-variables.js
export const AUTH_CONFIG = {
  domain: 'yourdomain.auth0.com',
  clientId: 'yourclientid',
  // callbackUrl: 'http://localhost:3000/callback',
  container: 'auth0-login-container'
}
Please do not forget to replace the domain and clientId with yours. I added the value of the container ID in which the form will be embedded. Second file you need is Login.js.
Auth/Login.js
import React from 'react';
import { Redirect } from 'react-router-dom';
import Lock from './Lock';
import isAuthenticated from './isAuthenticated';

const Login = (props) => (
  isAuthenticated() ? (
    <Redirect to={{
      pathname: '/private',
      state: { from: props.location }
    }} />
  ) : (
    <Lock location={props.location} />
  )
)

export default Login;
What <Login> does is very simple. It redirects users to /private page if they are already logged in, or shows <Lock> component that deals with all of login process if they are not.
I could have put all code of <Lock> inside <Login>. But, it would have been too many things going on: is a user already logged in, have sessions issued or not, after authenticated and session issued what to do, what if logged-in user manually visit /login page? Therefore, I separate one file into two. Hopefully this makes things easier.
Auth/Lock.js
import React, { Component } from 'react';
import { Redirect } from 'react-router-dom';
import Auth0Lock from 'auth0-lock';
import { AUTH_CONFIG } from './auth0-variables';

class Lock extends Component {
  lock = new Auth0Lock(AUTH_CONFIG.clientId, AUTH_CONFIG.domain, {
    auth: {
      responseType: 'token id_token',
      sso: false,
    },
    container: AUTH_CONFIG.container,
    theme: {
      primaryColor: '#3a99d8'
    }
  });

  constructor(props) {
    super(props);
    this.state = { loggedIn : false };
    this.onAuthenticated = this.onAuthenticated.bind(this);

    this.onAuthenticated();
  }

  onAuthenticated() {
    this.lock.on('authenticated', (authResult) => {
      let expiresAt = JSON.stringify((authResult.expiresIn * 1000) + new Date().getTime());
      localStorage.setItem('access_token', authResult.accessToken);
      localStorage.setItem('id_token', authResult.idToken);
      localStorage.setItem('expires_at', expiresAt);

      this.setState({ loggedIn: true });
    });
  }

  componentDidMount() {
    // Avoid showing Lock when hash is parsed.
    if ( !(/access_token|id_token|error/.test(this.props.location.hash)) ) {
      this.lock.show();
    }
  }

  render() {
    const style = { marginTop: '32px' }

    return(
      !this.state.loggedIn ? (
        <div>
          <h2>Login Page</h2>
          <div id={AUTH_CONFIG.container} style={style}></div>
        </div>
      ) : (
        <Redirect to={{
          pathname: '/private',
          state: { from: this.props.location }
        }} />
      )
    );
  }
}

export default Lock;
Basically, <Lock> has three responsibilities:
- Show login form with lock.show().
- Issue sessions after authenticated.
- Redirect to /private after sessions issued.
The <Lock> has the state loggedIn. At initial rendering it displays HTML elements and the login form because the loggedIn is set false. It, however, updates state when sessions are issued, which triggers re-rendering and this time renders <Redirect>. This is how the component redirect to /private page after authenticated.
The Lock by default has an option redirectUrl: The URL to redirect to after auth. It seems like that you don’t need a complicated way mentioned above. But, this redirection causes full-page reloading, and this might disrupt front-driven one page application. Hence, it is better to let your application itself to handle redirection.
For the basic use of Lock, you may want to check out Lock 11 for Web.
Private
Components/Private.js
import React from 'react';
import { Redirect } from 'react-router-dom';
import isAuthenticated from '../Auth/isAuthenticated';

const Private = (props) => (
  isAuthenticated() ? (
    <div>
      <h2>Private Page</h2>
      <p>Hey, you’re logged in!</p>
    </div>
  ) : (
    <Redirect to={{
      pathname: '/login',
      state: { from: props.location }
    }} />
  )
)

export default Private;
The <Private> is also as simple as it is. It shows message if users have already sessions, and if they’ are not it redirects them to the login page.
Logout
Auth/Logout.js
import React, { Component } from 'react';
import { Redirect } from 'react-router-dom';

class Logout extends Component {

  constructor(props) {
    super(props);
    localStorage.removeItem('access_token');
    localStorage.removeItem('id_token');
    localStorage.removeItem('expires_at');
  }

  render() {
    return (
      <Redirect to={{
        pathname: '/login',
        state: { from: this.props.location }
      }} />
    );
  }
}

export default Logout;
The <Logout> removes all sessions that are set at authentication and redirects users to /login page.
Run
After writing all of the codes above, it is time to run the application.
$ yarn startThe Webpack automatically opens localhost:3000 in the browser. If you see the top page, the application is properly running.
If you’ve got any trouble, you must check out your Auth0 account. In order to make the login process work, you must configure your Auth0 client settings properly.
Conclusion
We made a frontend-driven authentication app, embedding the form inside the application page. Not opening the login page of Auth0 surely improves the performance of the application and the usability.
Next step is to set up API server that requires authentication and fetch user’s specific data from it. The end application would be like ReactJS Authentication Tutorial.
Resources
Auth0 & Lock
React Router